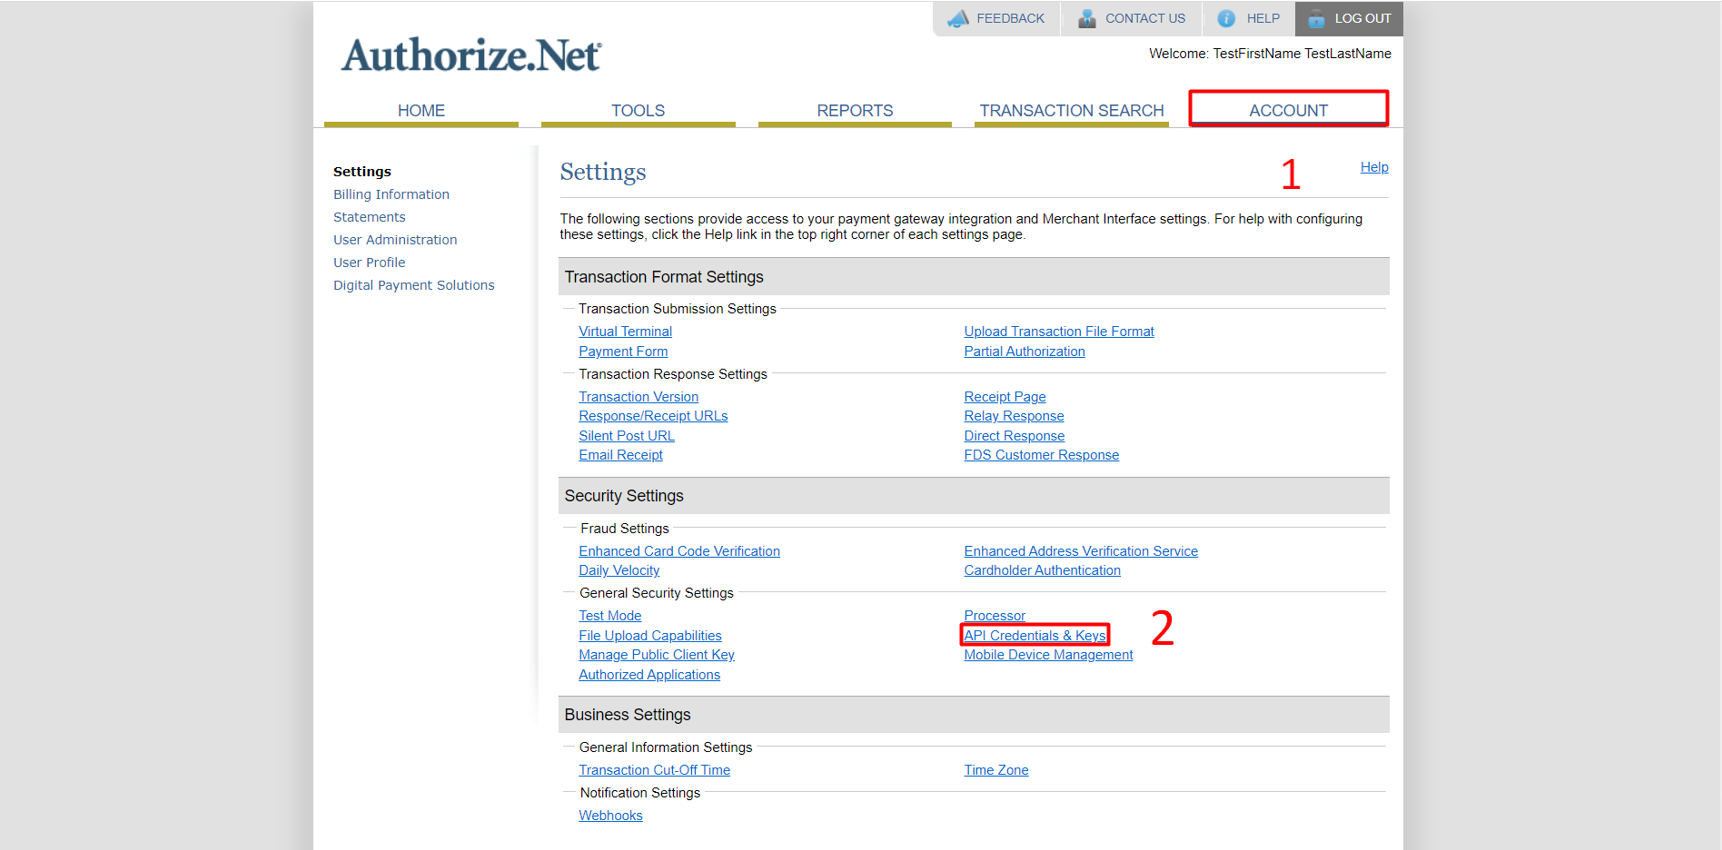
Step 1 – Login to Authorize.net gateway. Click on ‘Account’
Step 2 – Click on ‘API Credentials & Key’ link under settings
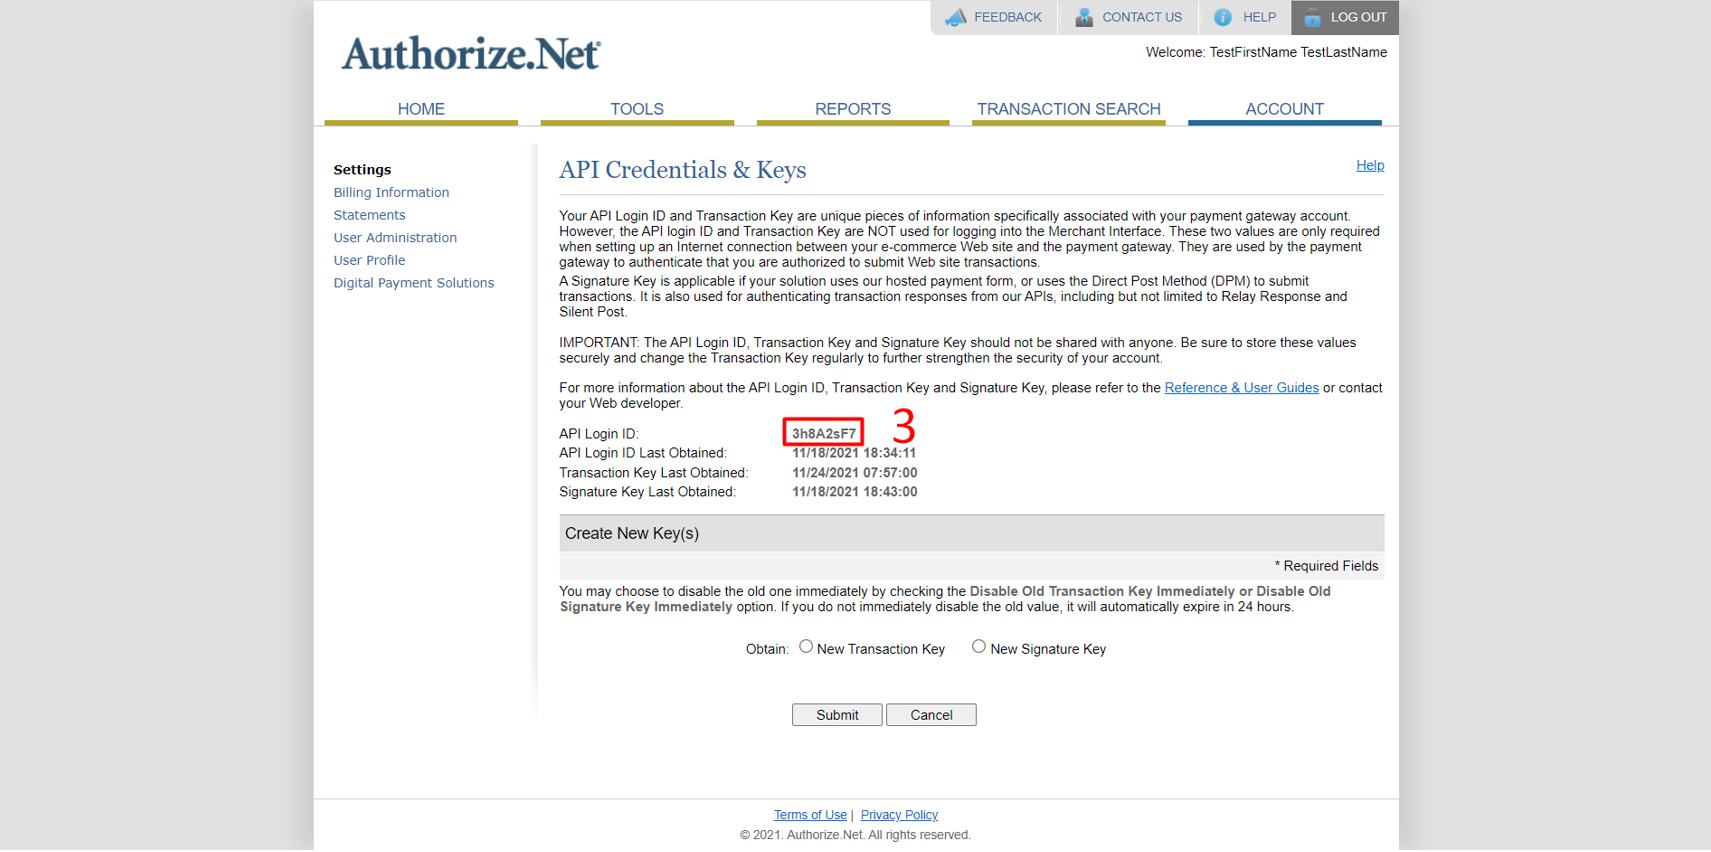
Step 3 – Copy the API Login ID from here.
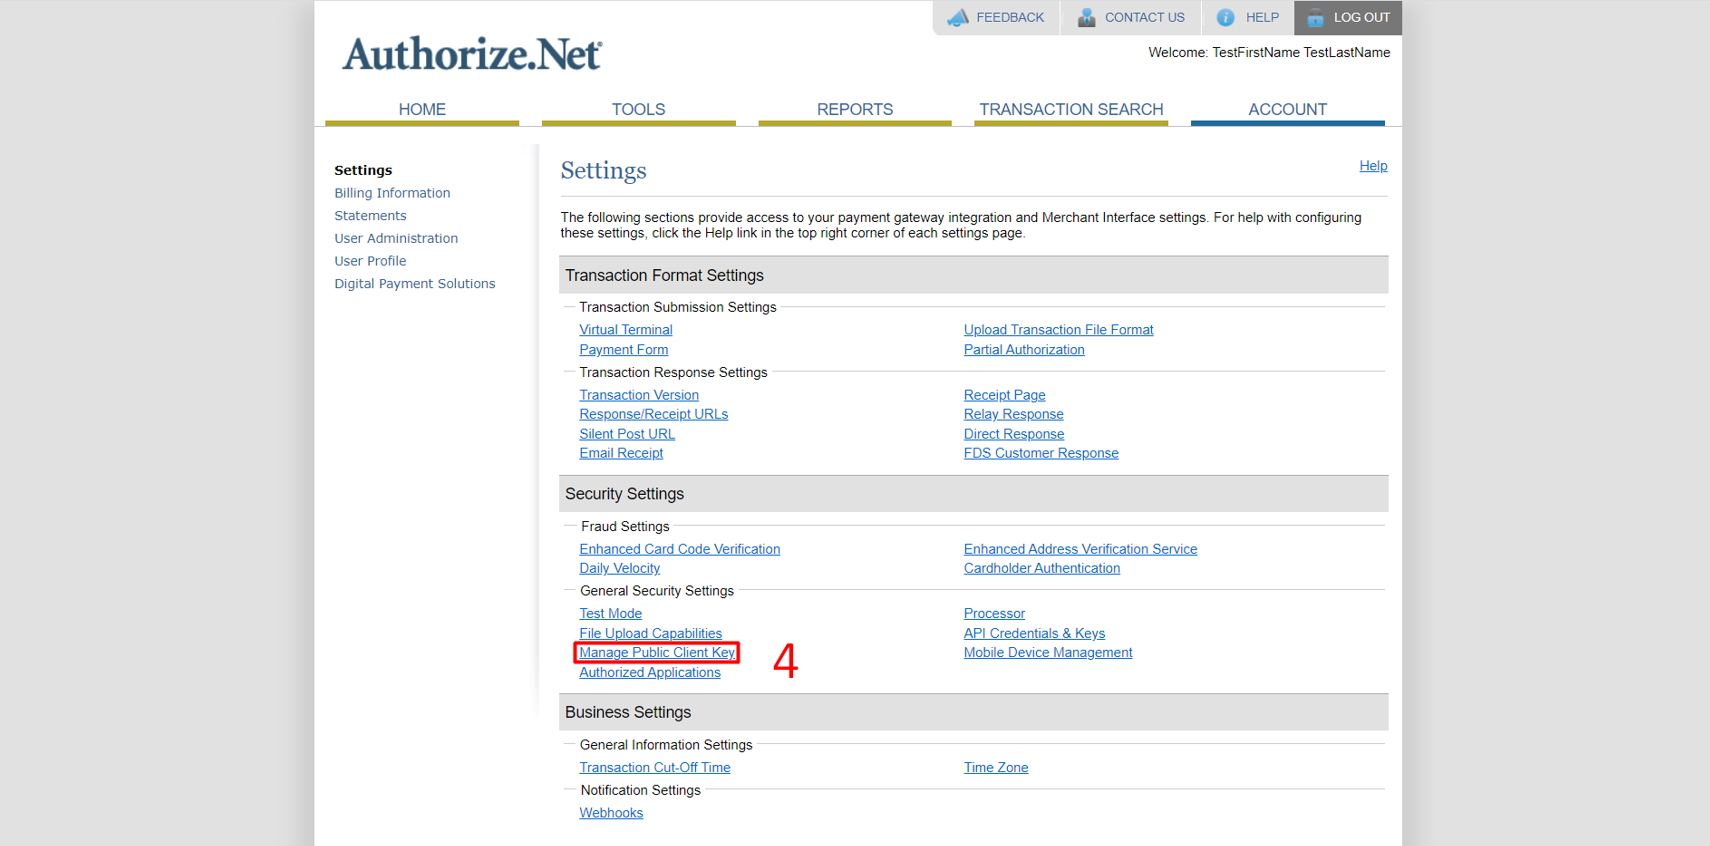
Step 4 – Click on ‘Manage Public Client Key’ link under settings
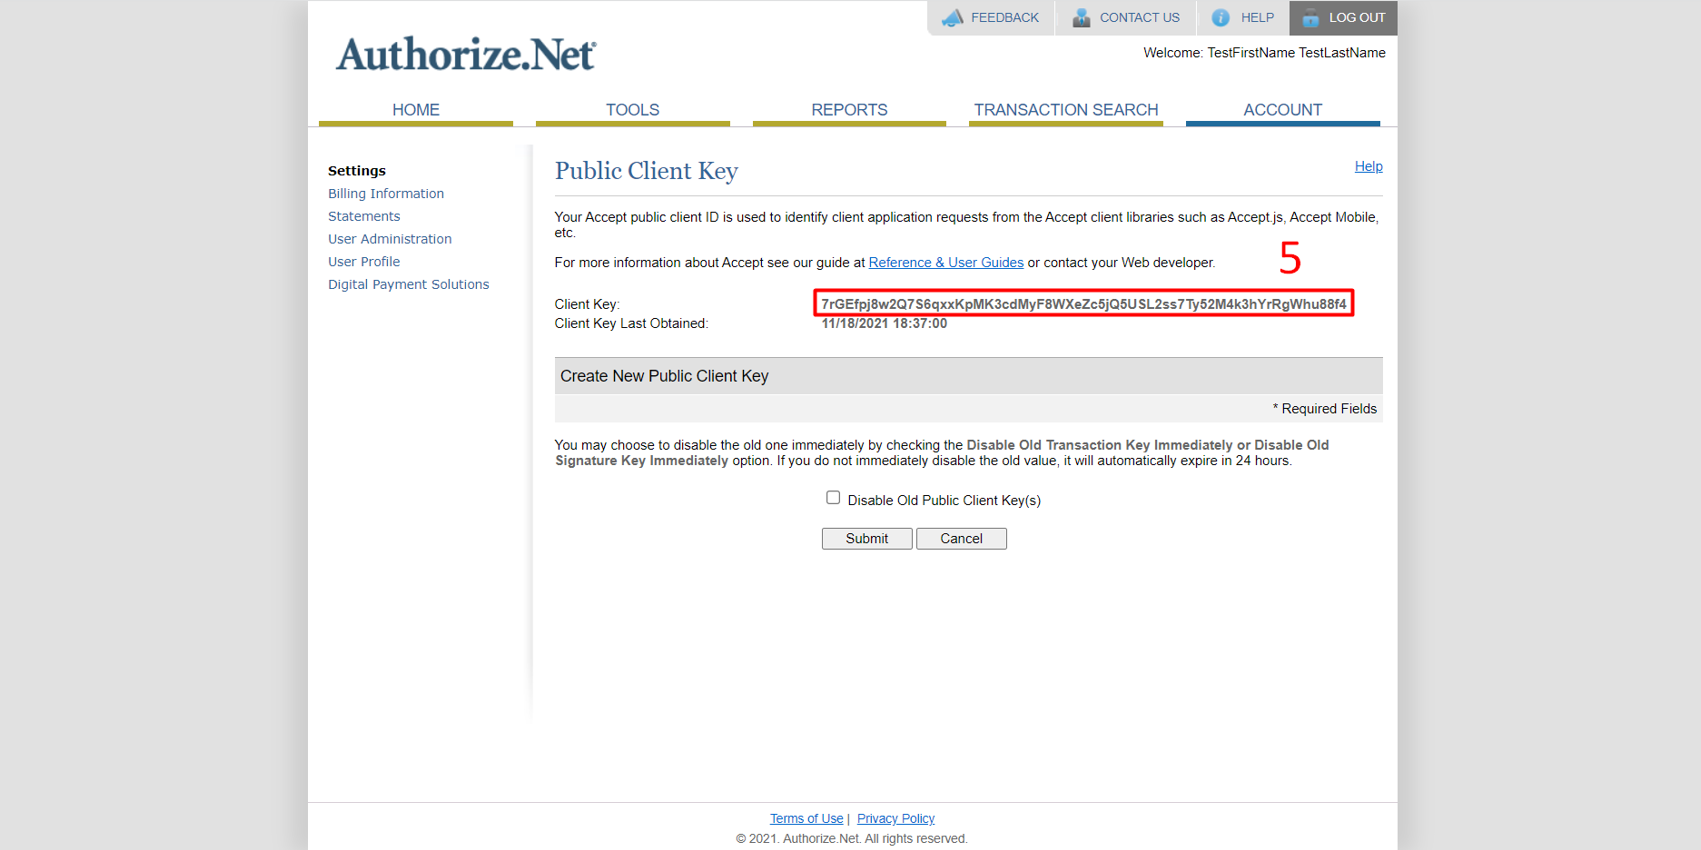
Step 5 – Copy the ‘Client key’ from here.
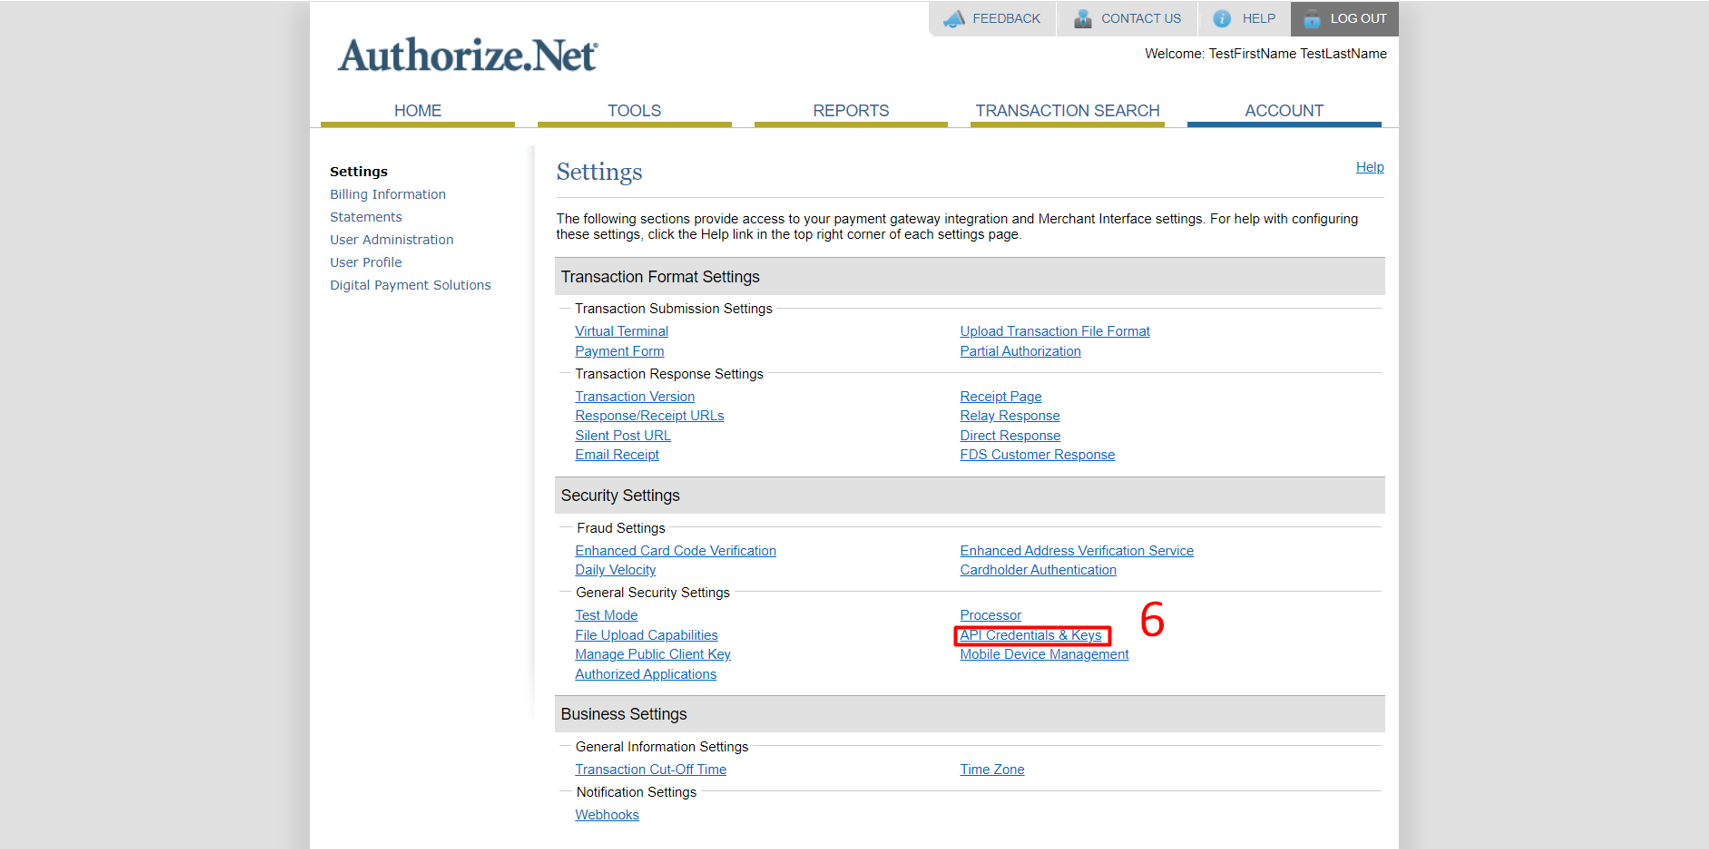
Step 6 – Click on ‘API Credentials & Keys’ under settings
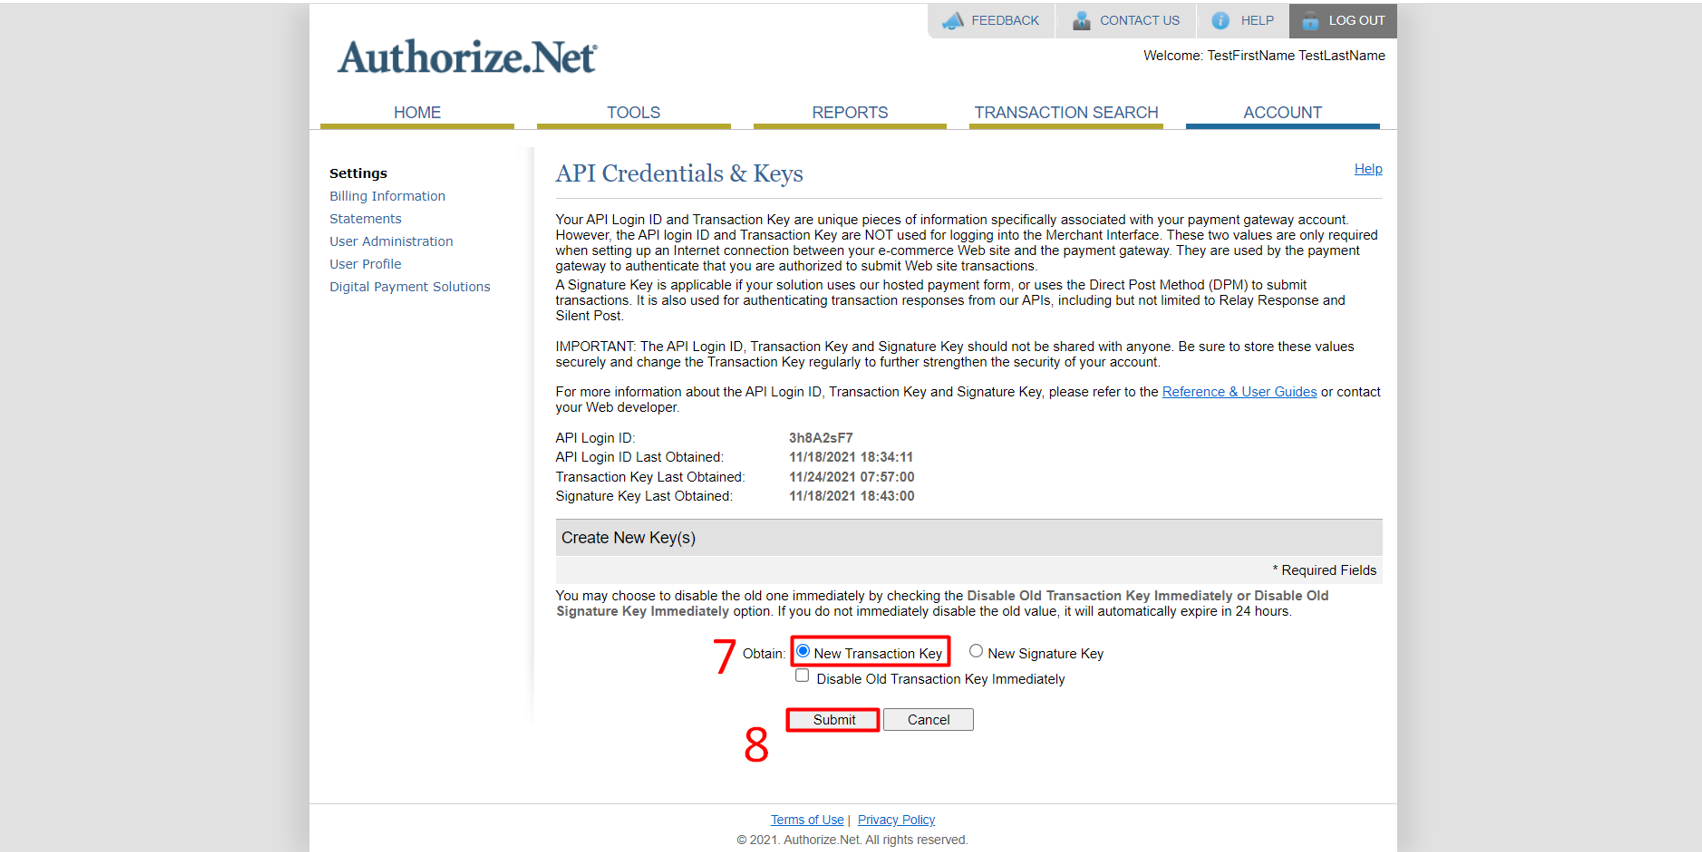
Step 7 – Select the ‘New Transaction Key’ radio button
Step 8 – Click on ‘Submit’ you can view the ‘Transaction Key’
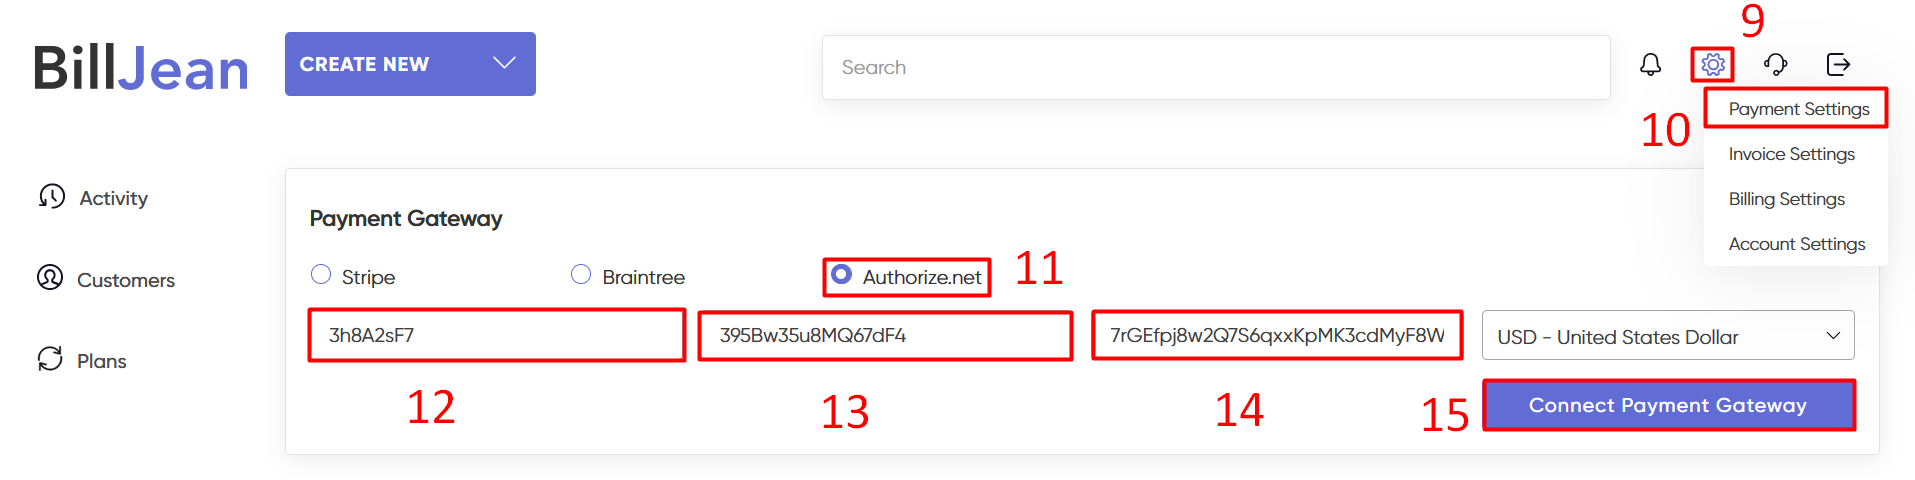
Step 9 – Login to BillJean App. Hover ‘Settings’ at the right top corner.
Step 10 – Click on ‘Payment Settings’
Step 11 – Select ‘Authorize.net’ payment gateway.
Step 12 – Enter ‘Login ID’ here
Step 13 – Enter ‘Transaction Key’ here.
Step 14 – Enter ‘Client Key’ here.
Step 15 – Click on ‘Connect Payment Gateway’ button.
Please feel free to reach out to us if you have any questions on team@billjean.com